In the ever-evolving world of coffee, a cool revolution is quietly brewing-one that marries the smooth, rich flavors of cold brew with the playful allure of velvety foam. Welcome too the art of cold brew coffee with foam, where chilled sophistication meets creamy indulgence in every sip. Whether you’re a caffeine connoisseur or a casual sipper looking to elevate your iced coffee experience, this refreshing fusion invites you to explore new textures, tastes, and techniques. Join us as we dive into the science, craft, and creativity behind turning humble cold brew into a frothy masterpiece that delights the palate and refreshes the spirit.
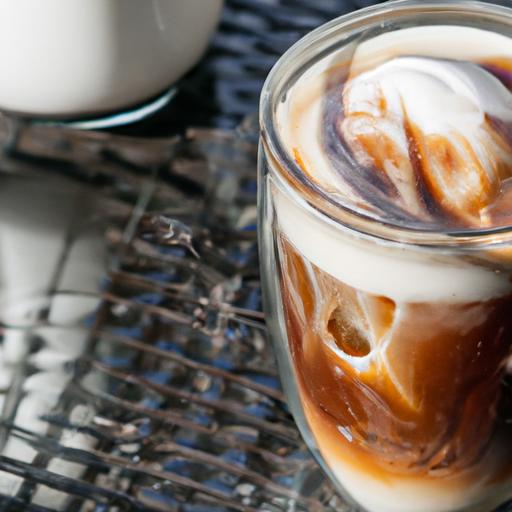
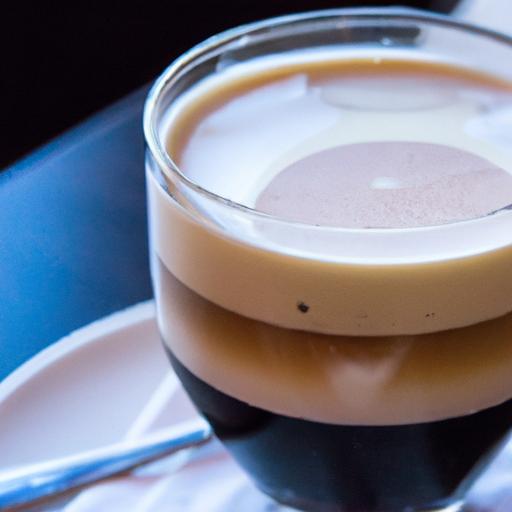
Cold Brew Coffee with Foam offers an irresistible combination of bold, smooth flavor balanced by a velvety layer of foam, turning each sip into a sensory delight. This technique draws from a delicate balance of science and artistry-a slow extraction process that unlocks complex coffee notes and a masterful foam technique that elevates texture and taste to barista-level perfection. Whether you’re a seasoned coffee enthusiast or just beginning to explore cold brews, understanding thes nuances will transform how you craft your chilled coffee experience from home.
Prep and Cook Time
- Cold Brew Extraction: 12-18 hours (steeping time)
- foam Readiness: 5-7 minutes
- Total Time: Approximately 18 hours (including steeping)
Yield
- Serves: 4 (each about 8 oz of cold brew with foam)
Difficulty Level
- medium – Requires some technique and patience but rewarding and approachable
Ingredients
- 1 cup coarsely ground 100% Arabica coffee beans (medium roast preferred for balanced acidity and sweetness)
- 4 cups cold, filtered water
- ½ cup cold milk (whole or plant-based for richer foam)
- 1 tbsp simple syrup or flavored syrup (optional, for sweetness)
- ½ tsp vanilla extract (optional, enhances foam aroma)
- Pinch of sea salt (optional, heightens flavor complexity)
Instructions
- Prepare the Cold Brew: Combine the coarsely ground coffee with 4 cups of cold, filtered water in a large glass jar or cold brew pitcher. Stir gently to saturate all grounds evenly.
- Steep Overnight: cover tightly and let the mixture steep in the refrigerator for 12 to 18 hours.Longer steeping results in a stronger,more concentrated brew.
- Strain the Cold Brew: Using a fine mesh sieve lined with cheesecloth or a specialized cold brew filter, strain the coffee concentrate into a clean container. Press grounds gently with a spoon to extract all liquid without over-extracting bitterness.
- Chill the Brew: Refrigerate the strained cold brew for at least 1 hour before serving to enhance smoothness.
- Make the Cold Foam: Pour ½ cup of cold milk into a glass jar or frothing pitcher. Add vanilla extract and a pinch of sea salt if using.
- Froth the Milk: Using a handheld frother or milk frother wand, vigorously froth until the milk quadruples in volume and forms a thick, silky foam with fine bubbles (about 3-5 minutes). For non-dairy versions, slightly warm the milk beforehand to improve frothing.
- Build Your Cup: Fill each glass with ice cubes, pour 6 oz of cold brew concentrate, then gently spoon or pour the cold foam on top to form a luscious layer.
- Sweeten and Garnish: Drizzle simple syrup over the foam or swirl in with the brew for a subtle sweetness. Finish with a light dusting of cocoa powder,cinnamon,or coffee grounds for an elegant touch.
Chef’s Notes: Tips for Success
- Bean Selection: Opt for freshly roasted beans with fruity or chocolate undertones. Single-origin beans add unique flavor profiles, while medium roasts ensure balanced acidity and sweetness ideal for cold brew.
- Grind Size: Use a coarse grind similar to raw sugar. Too fine a grind leads to over-extraction and bitterness, while too coarse results in weak brew.
- Water Quality: Filtered or spring water is key to preserve clarity and prevent off-flavors.
- Foam Technique: For intense silkiness, chill your milk and frothing tools beforehand. Experiment with oat or almond milk to find your favorite dairy-free texture.
- Make Ahead: Cold brew concentrate can be refrigerated for up to 2 weeks. Foam is best made fresh but can be prepared minutes ahead and stored covered.
- Troubleshooting: If foam lacks volume, try warming milk slightly or increasing frothing time. If cold brew tastes flat, increase coffee grounds or steeping time.
Serving Suggestions
- Serve in a tall, clear glass showcasing the inviting contrast of dark coffee and creamy foam.
- Garnish with a light sprinkle of ground cinnamon, nutmeg, or cocoa powder atop the foam for aromatic depth.
- Accompany with a twist of citrus peel (orange or lemon) to brighten flavor if desired.
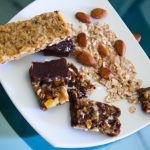
- Pair alongside delicate pastries like almond croissants or buttery shortbread for indulgence.
| Nutrient | Per Serving (8 oz) |
|---|---|
| calories | 60 (without sweetener) |
| Protein | 3 g |
| Carbohydrates | 4 g |
| Fat | 2 g |
Explore our comprehensive guide on selecting beans to deepen your cold brew mastery. For a scientific dive into coffee extraction, the sciencedaily article on cold brew chemistry offers remarkable insights.

Q&A
Q&A: Chill and Froth – The Art of Cold Brew coffee with Foam
Q1: What makes cold brew coffee different from traditional iced coffee?
A1: Unlike traditional iced coffee, which is brewed hot and then cooled down, cold brew coffee is made by steeping coarsely ground coffee beans in cold water for an extended period, usually 12 to 24 hours. This slow extraction process yields a smoother,less acidic,and naturally sweeter coffee that’s perfect for a refreshing chill.
Q2: How do you achieve that luxurious, creamy foam on top of cold brew?
A2: The secret to frothy cold brew lies in using a high-speed frother or a handheld milk frother that introduces tiny air bubbles into your chosen liquid-whether it’s milk, a dairy alternative, or a cream substitute. For a richer foam, slightly warm your milk or alternative before frothing. The result is an airy, velvety crown that elevates every sip.
Q3: Can you create foam without dairy?
A3: Absolutely! Plant-based milks like oat, almond, and soy are fantastic for frothing, though each behaves differently.Oat milk tends to create the creamiest foam, while almond milk produces lighter, airier bubbles. Experimenting with barista blends designed specifically for frothing can also help you achieve that perfect foam without dairy.
Q4: What’s the best coffee-to-water ratio for making cold brew at home?
A4: A commonly recommended ratio is 1:4 to 1:5 by weight, meaning one part coffee grounds to four or five parts water. This creates a concentrate that can be diluted to taste with water,milk,or your favorite alternative. Adjust the ratio if you prefer a stronger or milder brew.
Q5: How important is grind size for cold brew?
A5: Grind size is crucial.A coarse grind is preferred for cold brew because it allows for a slow, steady extraction and prevents over-extraction, which can cause bitterness. Think chunky sea salt rather than fine sand. This texture helps keep your cold brew smooth and balanced.Q6: Are there creative ways to flavor cold brew with foam?
A6: Definitely! You can infuse your cold brew with natural flavors like vanilla bean, cinnamon sticks, or a hint of cocoa nibs during steeping. For the foam, try blending in a touch of flavored syrups, such as lavender or hazelnut, or dust the foam with spices like nutmeg or cinnamon to add an aromatic pop.Q7: How long can cold brew coffee and its foam be stored?
A7: Cold brew concentrate can be refrigerated safely for up to two weeks without losing much flavor. Pre-frothing milk or alternatives is best done fresh to preserve texture and creaminess, though prepared foam can last a few hours if kept chilled and covered.
Q8: Can I make cold brew with other brewing methods?
A8: While traditional immersion is the classic cold brew method, you can replicate the effect using a French press or even a large Mason jar with a fine mesh filter. Just be patient-time and cold water are key. The goal is gentle extraction over time rather than swift brewing.
Q9: What equipment do I need to start crafting my cold brew coffee with foam?
A9: To begin your cold brew adventure, you’ll need coarsely ground coffee, cold filtered water, a steeping vessel (such as a jar or pitcher), a fine mesh strainer or coffee filter, and a frother for that creamy topping. Optional extras include a milk thermometer and a variety of milk or milk alternatives for experimentation.
Q10: How can I enjoy cold brew coffee with foam beyond the usual cup?
A10: Cold brew with foam is versatile! Use it as a base for coffee mocktails by adding sparkling water and citrus zest, or enhance desserts like affogatos with cold brew rather of espresso. The frothy topping also pairs wonderfully with sweet pastries and fresh fruit platters for a sophisticated brunch vibe.
Discovering the artistry behind cold brew coffee with foam transforms a simple drink into a sensory experience. From the chemistry of cold extraction to the tactile delight of creamy froth, every element invites creativity and enjoyment. cheers to chilled coffee moments!
Closing Remarks
As the final swirl of creamy foam settles atop your glass of cold brew, you realize that this isn’t just a drink-it’s a crafted experience. The art of cold brew with foam invites you to slow down, savor the smooth richness, and appreciate the delicate balance between bold coffee and airy texture. Whether you’re a seasoned barista or a curious coffee lover, mastering this chilled creation opens a new chapter in your daily ritual. So next time you crave a refreshing jolt or a moment of calm, remember: the perfect cup of cold brew with foam is more than just cool-it’s an artful pause in a bustling world. Cheers to chilling, frothing, and brewing brilliance!